|
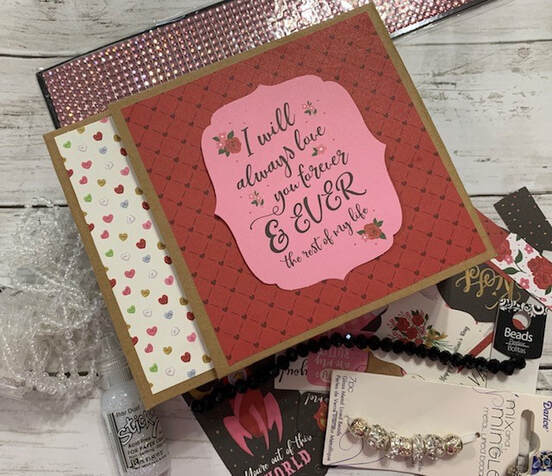
Today we are starting on our Friday series of mini albums done all different ways. We will explore the different and unusal ways to put a mini ablum together as well as adding photos and embellishments. Make sure to subscribe to our YouTube channel and click the bell so you will be notified when we upload new videos. You don't want to miss anything! What you see in the photo are just some of the goodies we will be adding to our album as we add our photos. Check below for the measurements for the covers. As we make the pages we will add the measurements for those on the bottom. Enjoy and let me know if you make one. I want to see. Products are linked below the video. Chipboard, you will need 2 pieces that is cut at 6 1/4"x5" and 2 pieces that is cut at 2"x5" and then 1 that is cut at 5"x5".
For your paper cover you will need 2 pieces that are cut at 7"x12", glue these together on the long end and you should end up with a 7"x24" piece of paper. Lay you chipboard out as shown in the video and glue it down as we show. Trim your corners and fold the excess paper over the chipboard and glue down. Place your magnets down now. The inside paper cover is cut at 4 3/4"x12 and 4 3/4"x10 3/4", glue these together and then glue on the inside of the album. Mats are cut at (4) 4 3/4"x6" Spine (4) 1 3/4"x4 3/4" Front flap (2) 4 3/4"x4 3/4" Glue these on and then you are ready for next weeks video, THE PAGES.
1 Comment
Lynda Kelly
1/22/2020 05:14:47 pm
Hi,
Reply
Leave a Reply. |
AuthorI am a crafter, teacher, businesswoman, mom, nana and wife and recent widow. I find that hard work keeps my mind off things of this world and my sweet hubby. Therefore crafting is my therapy. I love to teach what I know to others and share any inspiration that I can. I believe crafting is therapy. Thank you so much for your support. Archives
July 2024
Categories
|


 RSS Feed